Create a Domain Controller - W2003
This tutorial is part of The LAB project.
If you want to create a domain controller from an existing W2003 install instance you can do that pretty easy.
- You have to clone the virtual disk (example: VirtualBox Convert VDI, VMDK, VHD, RAW),
- change the SID of windows (NewSID) and
- promote the machine to Domain Controller.
I made this tutorial in VirtualBox with the following basic settings:
- 1 LAN card with no DHCP (10.0.1.0/24)
- 256MB RAM
- 20GB Hdd (Dynamically expanding storage)
I assume the followings:
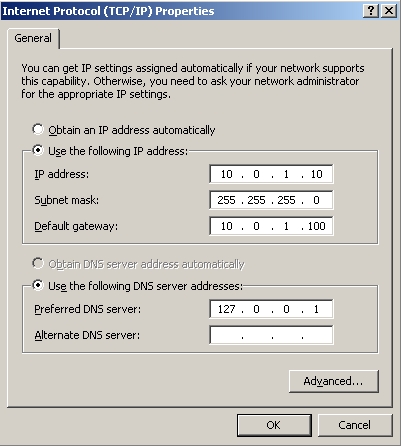
- Domain Controller IP will be: 10.0.1.10
- Gateway IP will be: 10.0.1.100
- Server name will be: W2003DC
- Domain will be: W2003.int
Previously you could download NewSID from the Sysinternals but nowadays it is removed from there, so you had better do a Google search on it (ex.:http://download.cnet.com/NewSID/3000-2092_4-95739.html or http://www.softpedia.com/progDownload/NewSID-Download-41001.html).
The process:
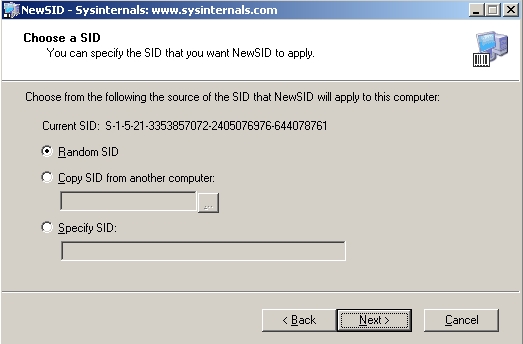
Simply run the tool, and change SID to a random SID.
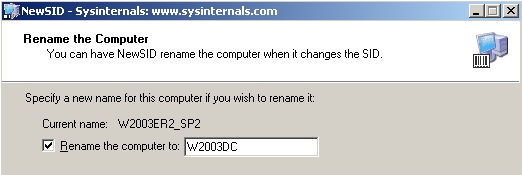
On the next screen chosoe the new name for the computer
and finish the process.
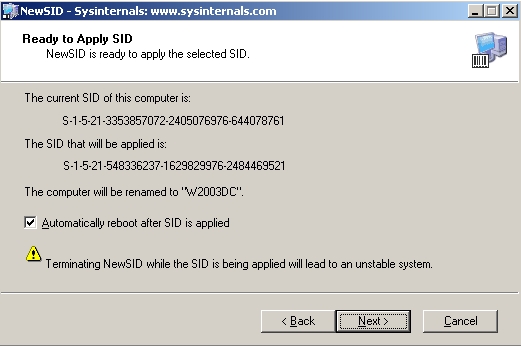
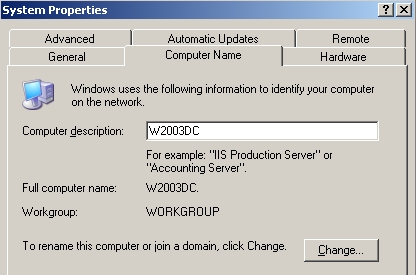
After the reboot, you have a machine with new SID. Check if the computer name was successfully changed to "W2003DC".
Network Settings
Before promoting you have to set a fixed IP address for your machine in Start/Control Panel/Networking/Local area connection/"TCP/IP"/Properties.
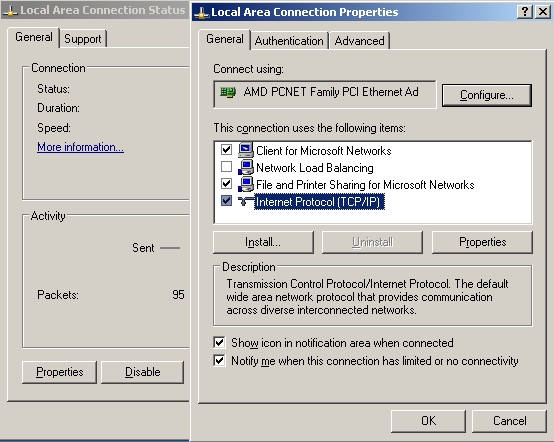
Set the IP address, netmask, gateway and DNS and click "OK".
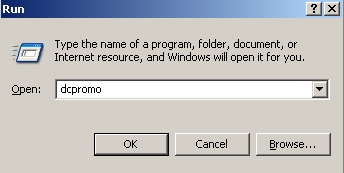
Promoting to a Domain Controller
Click Start/Run and start "dcpromo", this will start the Active Directory Installation Wizard.
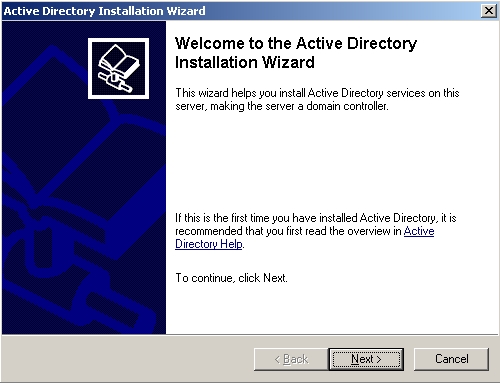
Click on "Next".
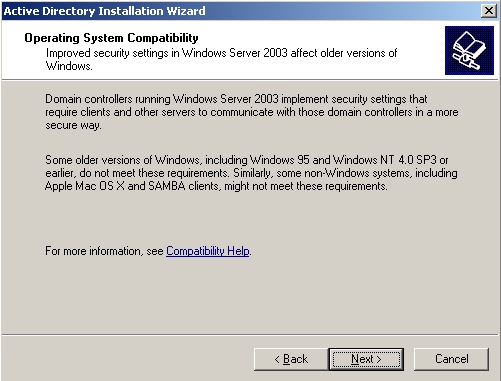
Read the compatibility message and click "Next".
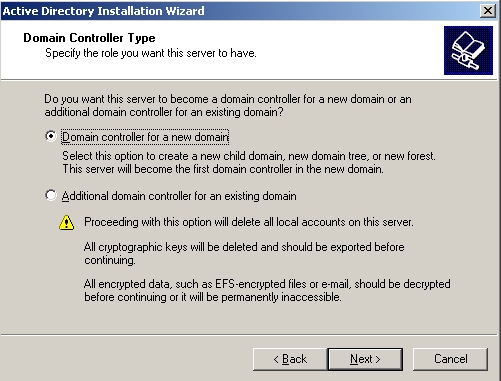
This is the first Domain Controller we have, so select the "Domain controller for a new domain" and click "Next".
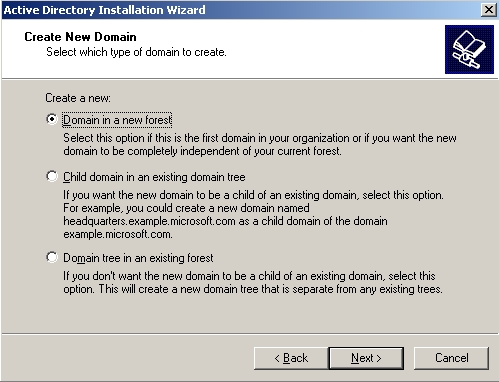
This is the first Domain Controller we have, so select the "Domain in a new forest" and click "Next".
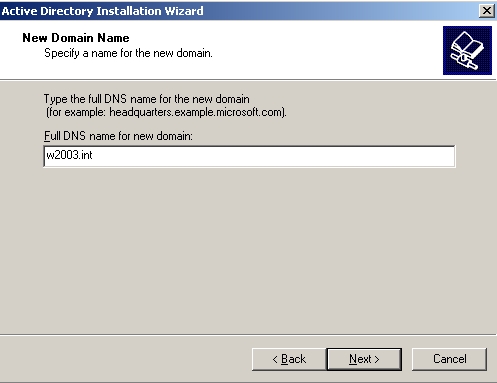
Choose the "Full DNS name" for the new domain. This can be almost anything you want, just pick a simple name. Click "Next".
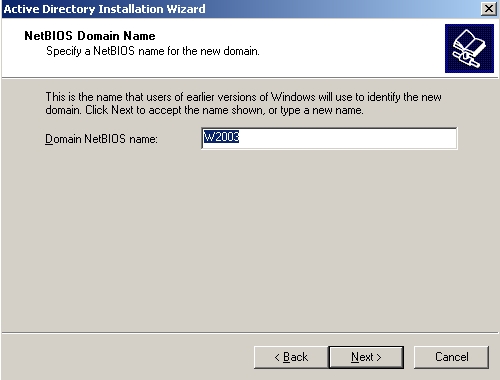
Type a custom NETBIOS name and click "Next".
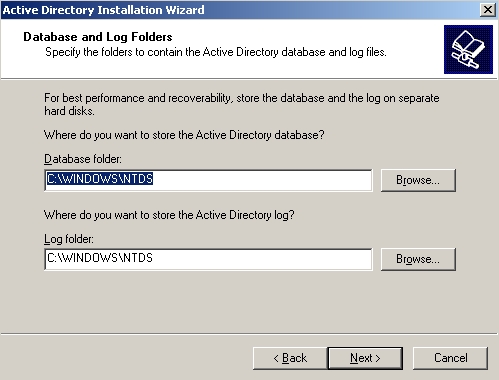
Select the folders for logs. Usually you should put them on a separate disk, but now it is a test system, so leave the defaults and click "Next".
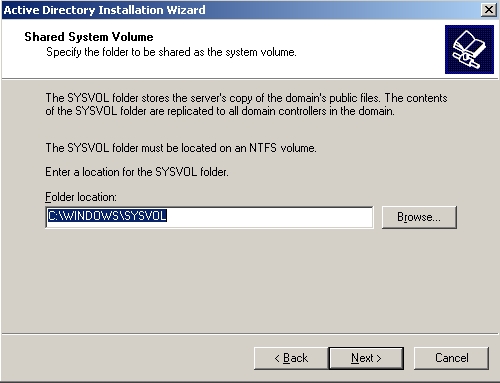
The SYSVOL is a public share where things like .MSI packages can be capt and distributed from. Leave the default values for now and click "Next".
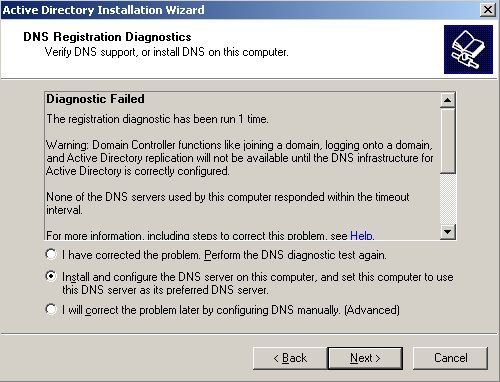
Because this is the only computer in the network, there are no DNS servers. Let this be the one. Choose "Install and configure the DNS server on this computer...".
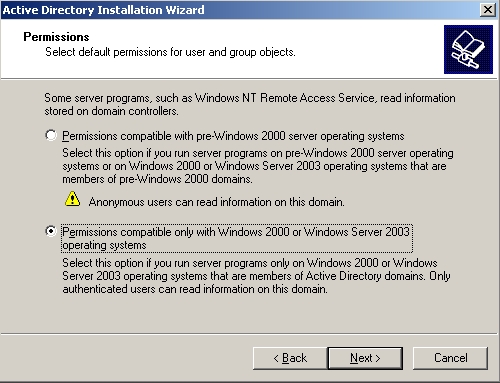
Select default permissions for user and group objects. This determines backward compatibility with older Windows systems. Choose "Permission compatible only with Windows 2000 or Windows Server 2003..." (we do not want to use pre-Windows 2000 machines).
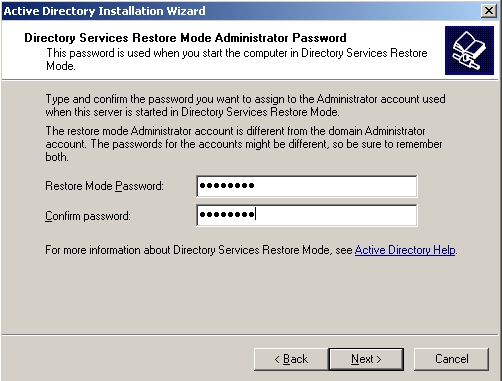
Set the password for Directory Services Restore Mode password. This is useful for restoring Active Directory objects, DNS, DHCP...whatever services you use. Write it to a paper and put it in the safe and remember that it is there when you need it. Hopefully you only need this if you need to test a disaster recovery plan. Click "Next".
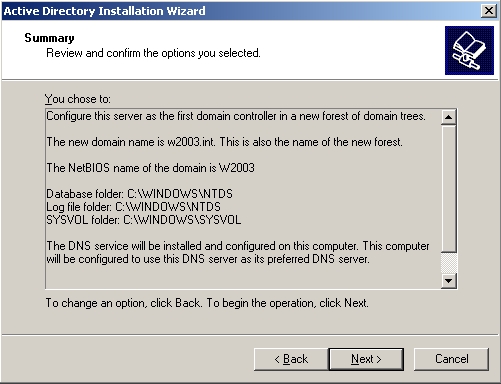
Summary of settings, click "Next" to start the install.
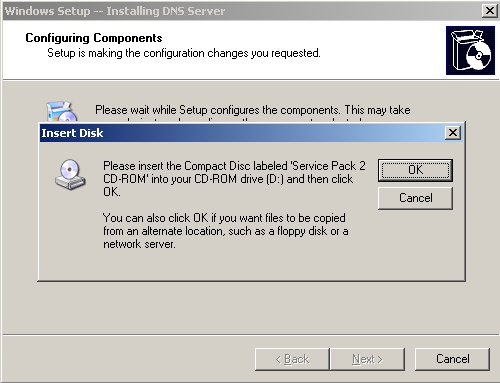
The setup wizard will ask for the install CD (actually if SP2 is integrated into it which is the case now for me), insert it and it will automatically resume the dcpromo installation.
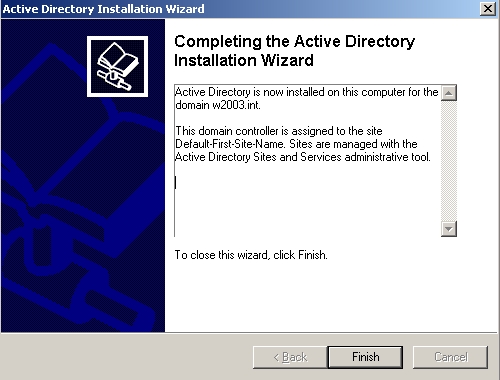
You can finish the installation by clicking "Finish".
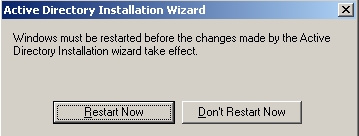
After the setup finished you have to reboot the computer.
You are finished with creating your first Domain Controller. Now you have to create some users and policies and whatever you need.
The last step is to check that the DNS successfully installed after reboot. Click on Start/Administrative Tools/DNS and check the Forward lookup zones. Verify that in your new dns the following directories exists: _tcp, _udp, _sites, _msdcs. these are essential for a correct DNS-AD combo.